The tile combinations that read as genuinely high-end share a few common threads — larger format or minimal grout lines, intentional pattern placement rather than uniform coverage throughout, and material choices (natural stone, zellige, dimensional tile) that mass-market builder-grade tile doesn’t typically use.
Below are 12 combinations that consistently elevate a shower’s look, with real material notes and cost considerations for each.
Looking for specific wall-and-floor pairing ideas? See our companion guide to shower tile combinations for an expensive look.
1. Large Format Marble-Look Porcelain With Minimal Grout Lines
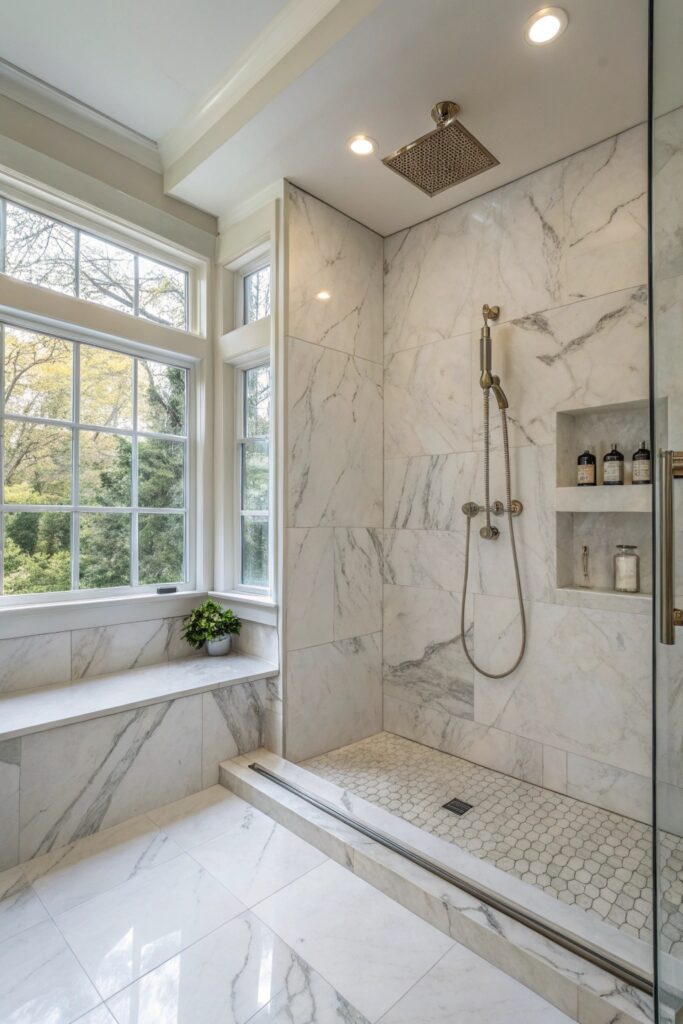
Porcelain tile in large formats (24×48 inches or bigger) with a realistic marble veining pattern minimizes grout lines considerably compared to smaller tile, which is a major factor in how high-end a shower reads — fewer visible seams create a more seamless, expensive-looking surface.
Porcelain specifically outperforms genuine marble for shower use since it’s non-porous and doesn’t require the sealing maintenance real marble does, while still delivering a comparable visual at a lower cost, typically $4-8 per square foot versus $10-20+ for genuine marble slab.
2. Subway Tile With a Herringbone Accent
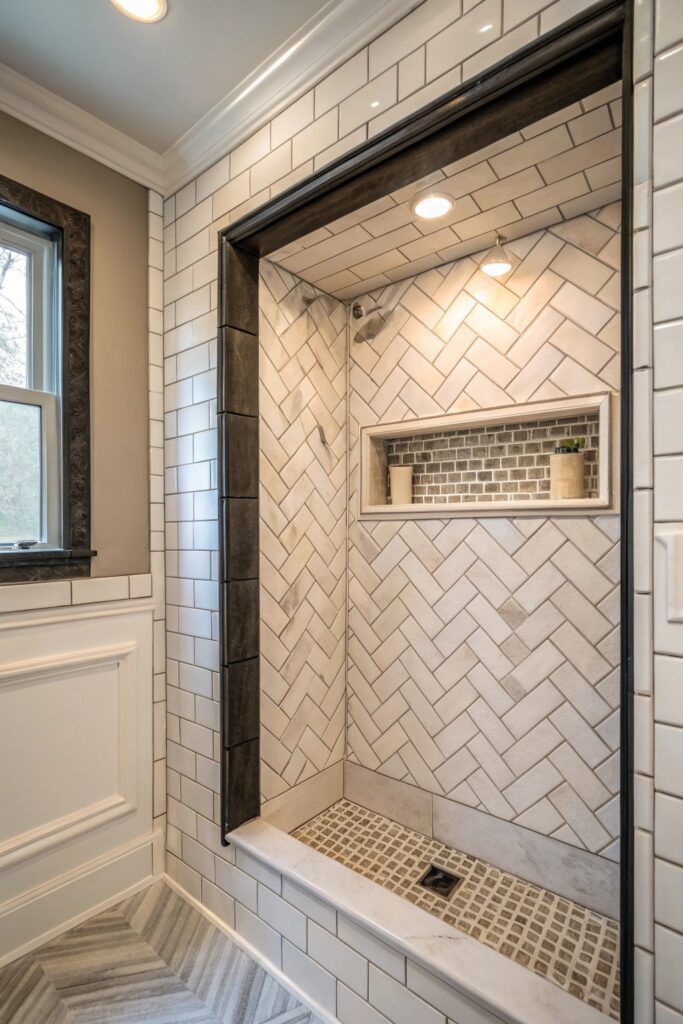
Classic subway tile in a standard running-bond pattern across most surfaces, paired with a herringbone-laid accent strip or niche, adds visual interest without committing an entire shower to a more elaborate pattern throughout.
This combination works particularly well because it keeps the primary installation labor cost low (subway tile is among the most affordable, $2-5 per square foot) while concentrating the more labor-intensive herringbone pattern to a smaller accent area.
3. Zellige Tile for Organic, Handmade Texture
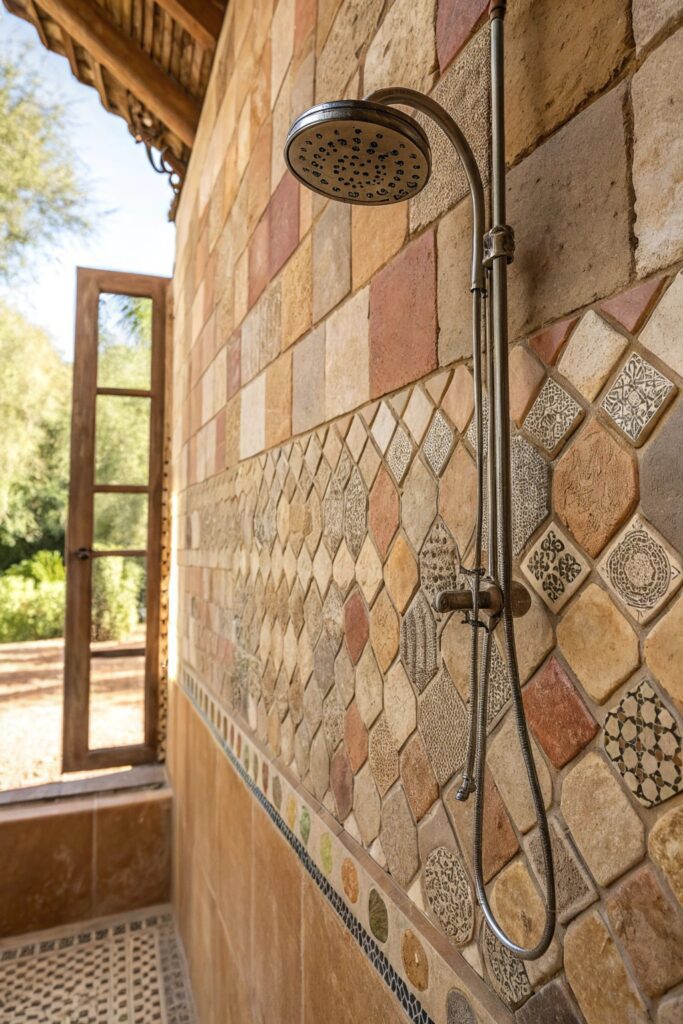
Zellige, a handmade Moroccan clay tile with intentional surface irregularity and variation, brings a genuinely artisanal texture that mass-produced tile can’t replicate, and it’s become a signature choice for higher-end bathroom renovations specifically because of this handmade quality.
Authentic zellige runs considerably higher than standard tile ($15-30+ per square foot) given its handmade production, and its irregular surface requires more skilled installation, so budget for both material and labor costs accordingly.
4. Black and White Checkerboard Floor Tile
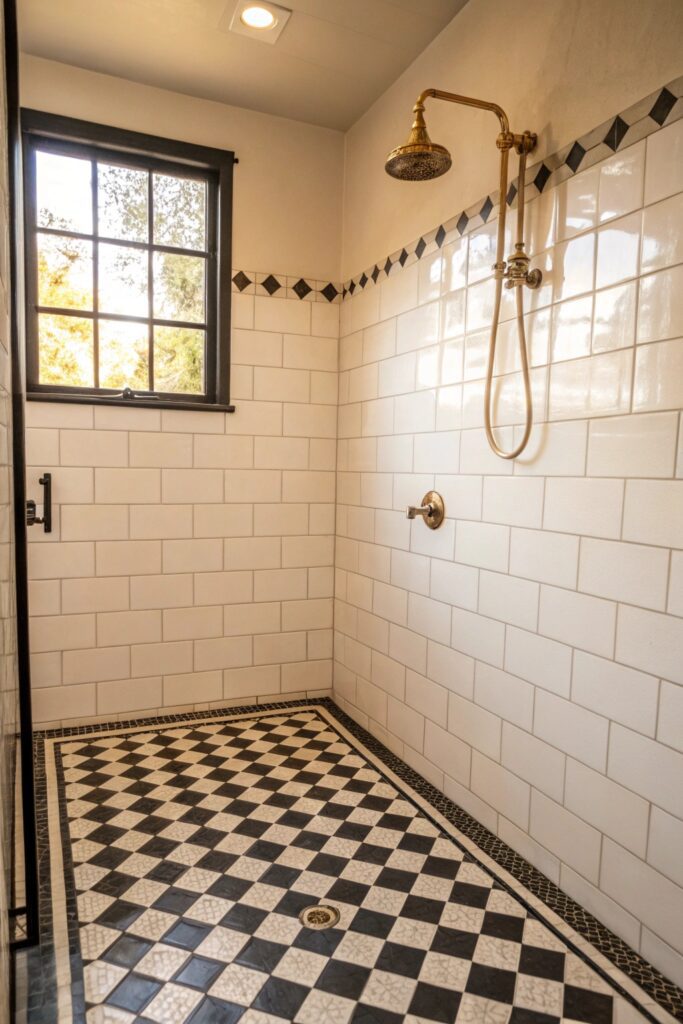
A classic checkerboard pattern on the shower floor, especially in a smaller-format tile (2×2 inches works well for the necessary slope and drainage), pairs a timeless, graphic pattern with practical non-slip texture that smaller tiles naturally provide.
This pattern reads as intentionally vintage-inspired or classic rather than dated, which is part of why it’s remained a consistently popular choice across changing broader tile trends over many years.
5. Textured 3D Tile for Wall Interest
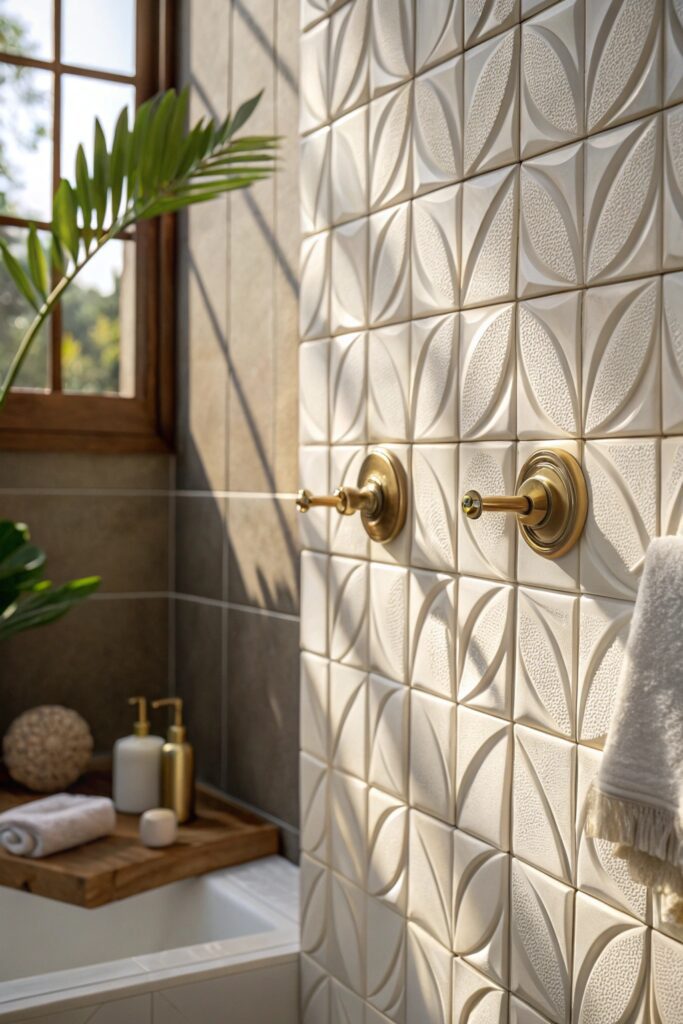
Dimensional tile with a raised or sculptural surface pattern (fluted, scalloped, or geometric relief) adds tactile depth to a shower wall that flat tile can’t achieve, working particularly well as a feature wall rather than covering an entire shower.
This tile category tends to run higher than flat tile ($8-15 per square foot) given the more complex manufacturing process, and it’s worth pairing with simpler flat tile elsewhere in the shower to avoid the space feeling visually overwhelming.
6. Two-Tone Tile With a Contrasting Border
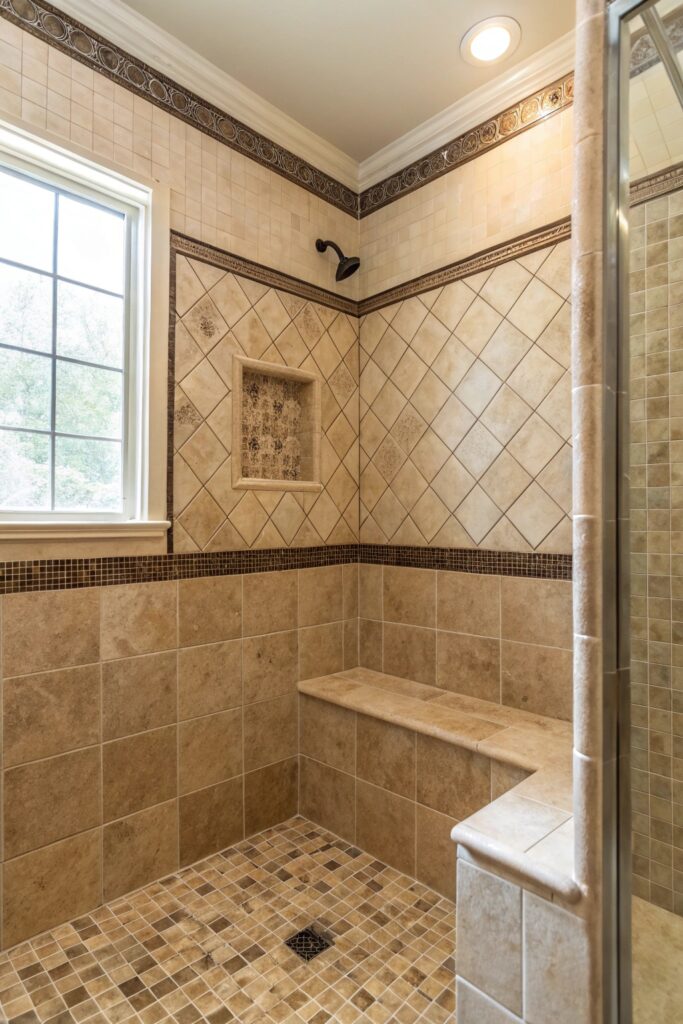
Using a primary tile color on the main shower walls with a contrasting accent tile forming a defined border or stripe (often at chair-rail height) creates architectural definition that a single uniform tile choice doesn’t provide.
This is a classic technique for adding visual structure to a shower without the cost of a full pattern change, since the accent border typically covers a small fraction of the total tiled area.
7. Bold Colored Tile as a Statement Wall
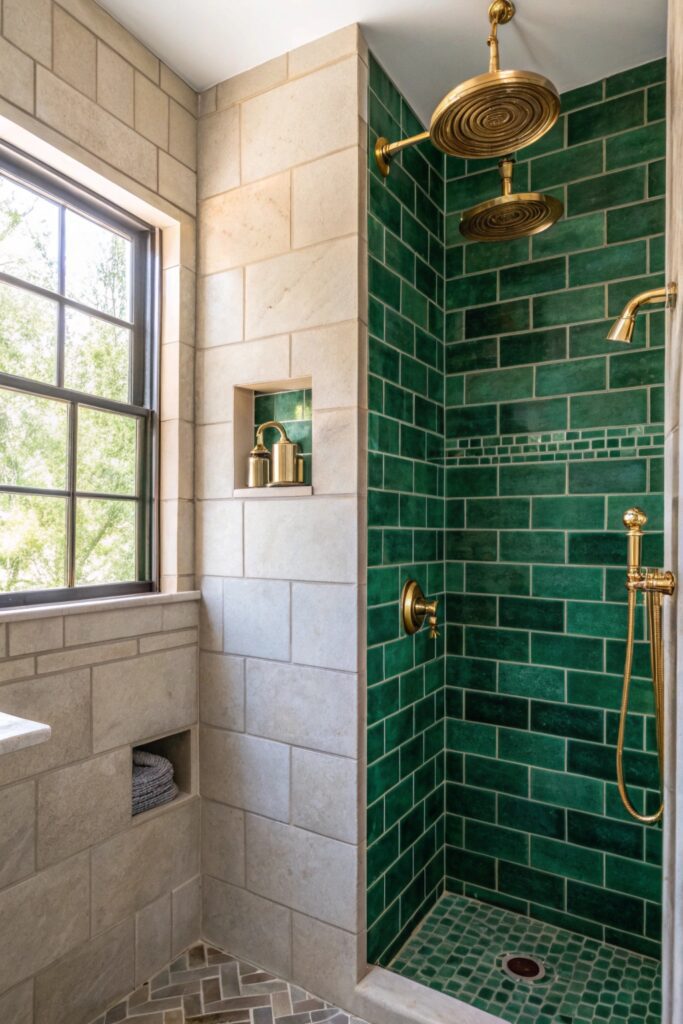
A saturated color — deep green, cobalt blue, terracotta — applied to one shower wall while keeping the remaining surfaces neutral creates a genuine design statement without the commitment (or cost) of a fully colored shower.
This approach reads as more current and intentional than an entirely neutral shower, and it’s a reasonable way to introduce personality into an otherwise resale-conscious, neutral bathroom renovation.
8. Mosaic Tile for the Shower Floor
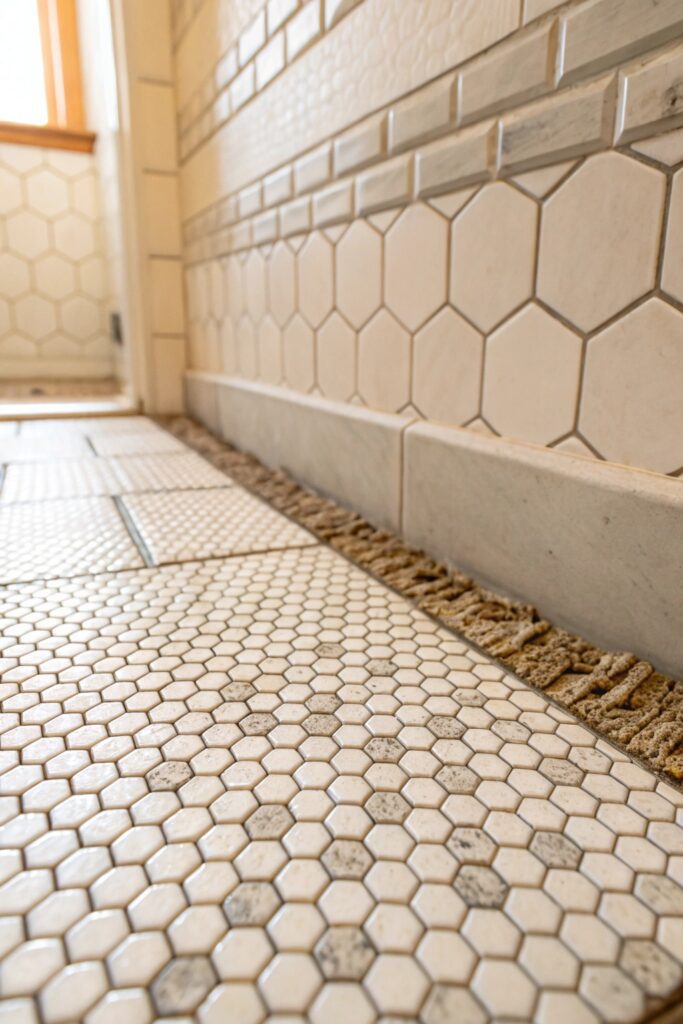
Small-format mosaic tile (typically on a mesh backing sheet for easier installation) is a practical necessity for shower floors specifically, since smaller tile pieces accommodate the slight slope needed for drainage in a way large-format tile can’t.
Beyond the practical need, mosaic floor tile in a color or pattern that complements the wall tile ties the whole shower together as a cohesive design rather than treating the floor as a purely functional afterthought.
9. Marble Herringbone on the Shower Floor
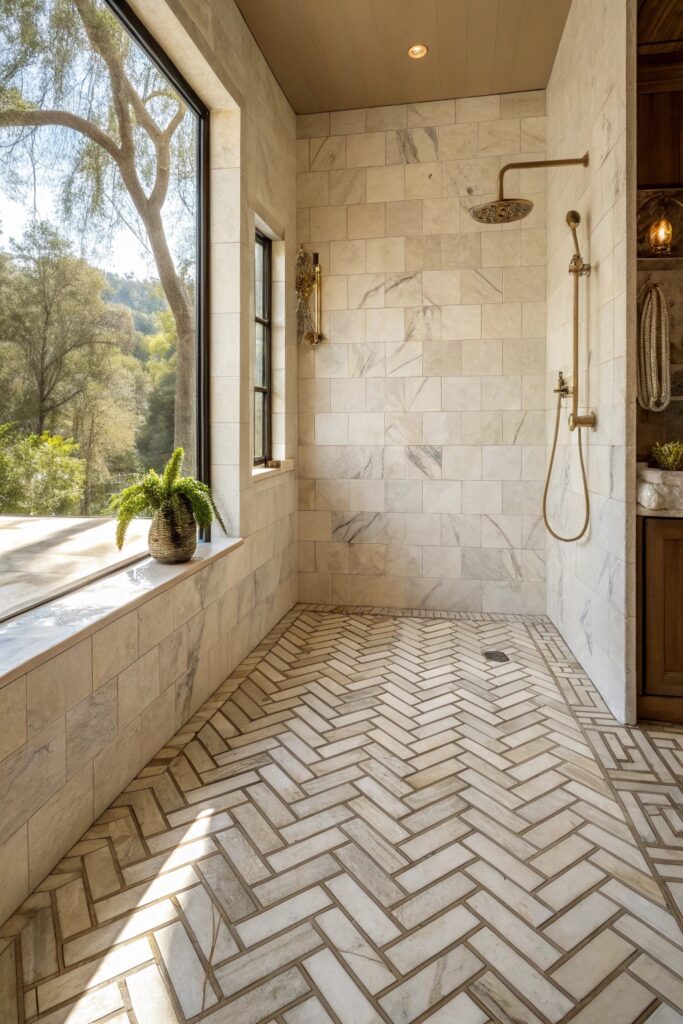
A herringbone-laid marble mosaic on the shower floor combines the practical small-format requirement with a genuinely elevated pattern, reading as a considered design choice rather than a purely functional floor covering.
This is a higher-cost combination given both the marble material and the more labor-intensive herringbone installation, but it’s specifically the kind of detail that reads as a meaningfully upgraded, high-end bathroom feature.
10. Matte Black Tile With Brass Accents
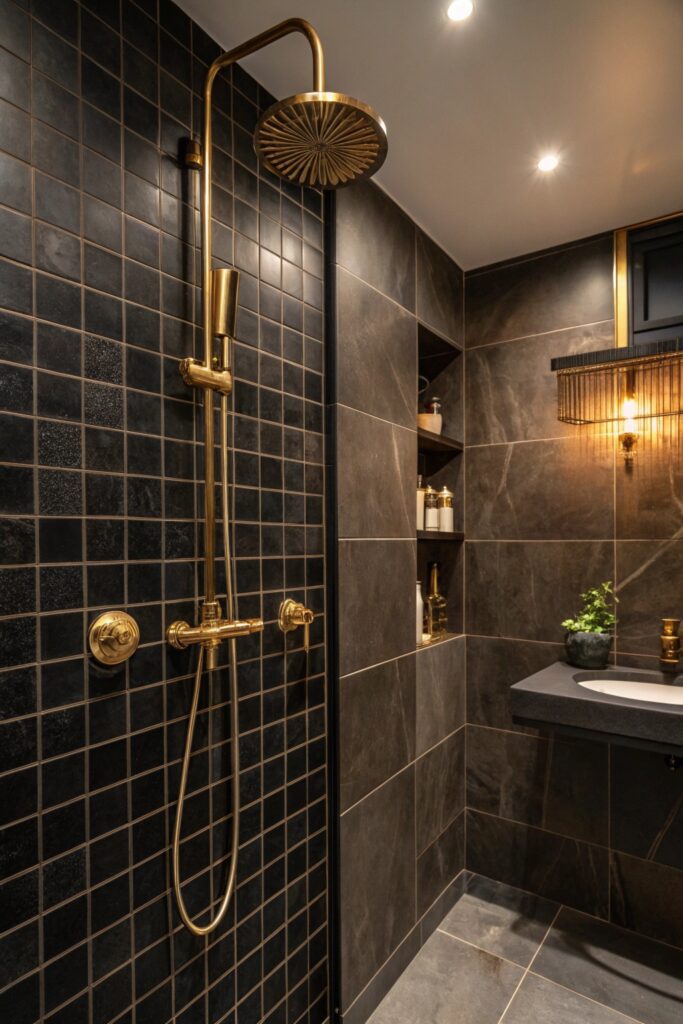
Matte black tile (rather than glossy) paired with brass or gold-toned fixtures and hardware creates a dramatic, modern contrast that’s become a signature combination in higher-end bathroom design over recent years.
Matte finishes specifically show water spots less than glossy black tile, which is a genuine practical advantage in a shower environment where hard water spotting is an ongoing maintenance consideration.
11. Natural Stone Pebble Tile for a Spa Feel
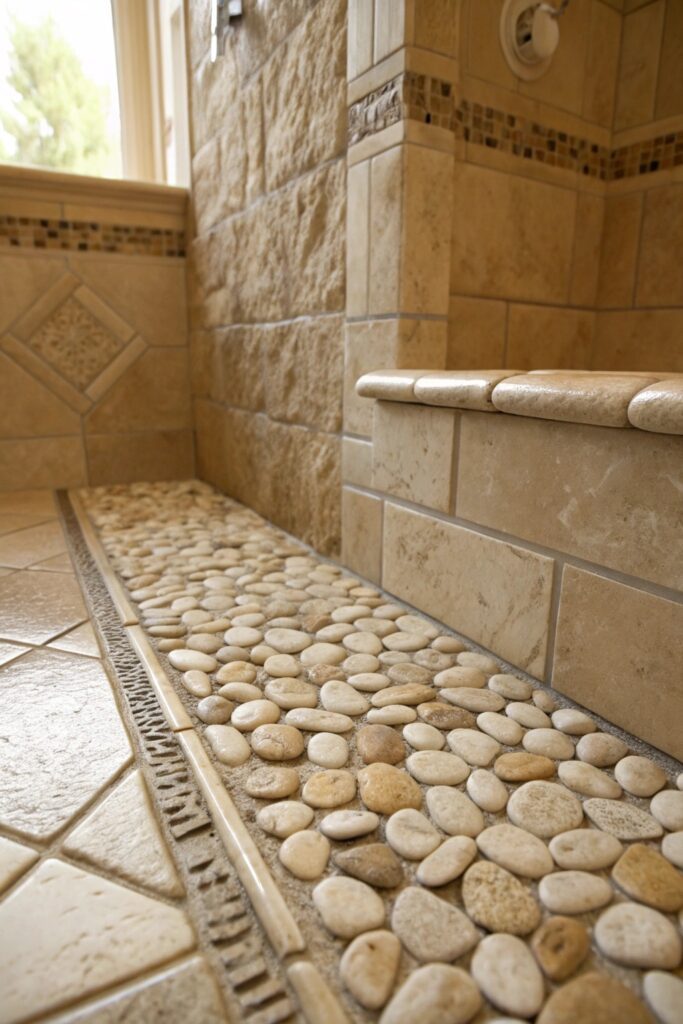
Pebble tile, made from small rounded natural stones set on a mesh backing, creates a genuinely spa-like texture underfoot that no other tile format replicates, often used specifically on the shower floor for this tactile effect.
Pebble tile requires more grout coverage than flat tile given the irregular stone shapes, which means more maintenance attention to grout sealing to prevent staining and mildew in the grout-heavy surface.
12. Vertical Stacked Tile for Height Illusion
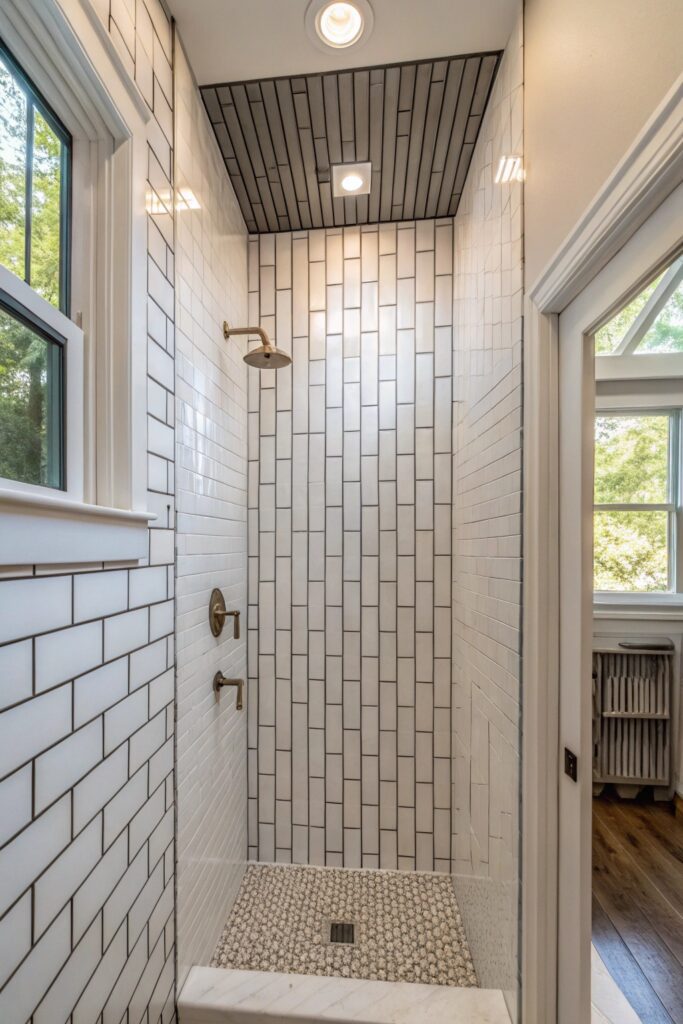
Installing rectangular tile in a vertical stack pattern (rather than the more common horizontal running bond) draws the eye upward, creating the illusion of a taller shower and ceiling than the actual dimensions provide.
This is a genuinely useful technique specifically for bathrooms with lower ceiling heights, where the vertical lines create a perceived height increase without any actual structural change to the room.
How to Choose the Right Tile Combination for Your Bathroom
Start with your bathroom’s actual ceiling height and square footage before choosing a pattern — vertical stacking and large-format tile both help smaller or lower-ceilinged bathrooms feel more expansive, while bolder patterns and darker colors work better in bathrooms with more natural light and square footage to support them without feeling cramped.
Wrapping It Up
Large-format porcelain and a well-chosen accent pattern (herringbone, a contrasting border) do the most to elevate a shower’s look relative to their cost, since both work within a standard renovation budget while still reading as intentional design choices. Reserve the higher-cost options — zellige, natural marble, dimensional tile — for a smaller accent area if budget is a genuine constraint, since concentrated use of a premium material often reads as more considered than spreading a moderate budget thin across an entire shower.